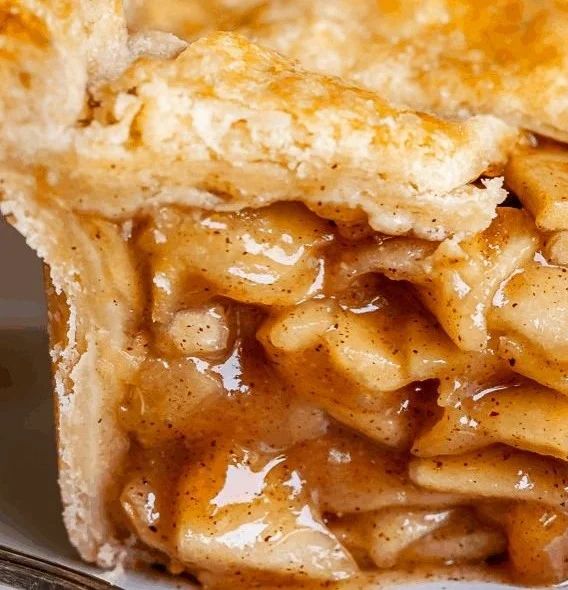
There’s nothing quite like the warm aroma of apple pie wafting through your kitchen. This dessert captures the essence of comfort food, tantalizing taste buds with its sweet, spiced filling nestled beneath a golden, flaky crust. Whether it’s a special occasion or just a cozy night in, homemade apple pie is sure to put a smile on everyone’s face. There’s something magical about transforming simple ingredients into a baked masterpiece that bursts with flavor—let’s explore how to make this timeless classic.
Why you’ll love this dish
The combination of tender, juicy apples and the buttery, flaky crust creates a symphony of flavors and textures. Each bite offers a delightful contrast between the soft filling and the crisp pastry, enhanced by warm spices like cinnamon and nutmeg. This dish is not just delicious; it also brings back fond memories for many people, evoking nostalgia for family gatherings and holidays.
"This is hands down the best apple pie I’ve ever made! The crust was flaky, and the filling was perfectly spiced."
Creating this pie at home allows you to adjust the sweetness and spice to your preference, ensuring every slice satisfies your taste. The experience of making it is just as enjoyable as tasting it—rolling out the dough, preparing the apples, and watching it bubble away in the oven provides a sense of satisfaction and accomplishment.
How it comes together
This delightful pie is made in simple stages: first, you’ll prepare the crust, allowing it to rest and chill for easy rolling. Next, the apples require a bit of slicing and mixing with sugar and spices, infusing them with flavor. Once assembled, the pie bakes to golden perfection, filling your home with an irresistible aroma.
Prep Time: 30 min | Cook Time: 50 min | Total Time: 1 hr 20 min
What you’ll need
-
For the pie crust:
- 2 ½ cups all-purpose flour
- 1 teaspoon salt
- 1 tablespoon sugar
- 1 cup unsalted butter (chilled, cubed)
- 6-8 tablespoons ice water
-
For the apple filling:
- 6-8 medium apples (a mix of Granny Smith and Honeycrisp works well)
- ¾ cup granulated sugar
- 1 teaspoon ground cinnamon
- ¼ teaspoon ground nutmeg
- 2 tablespoons lemon juice
- 2 tablespoons all-purpose flour (for thickening)
-
For assembly:
- 1 egg (beaten, for egg wash)
- Extra sugar for sprinkling on top
Do take the time to use a variety of apples. Each type contributes unique flavor notes, making your pie more complex and enjoyable.
Step-by-step instructions
-
Make the crust: In a large bowl, whisk together the flour, salt, and sugar. Add the chilled butter, mixing until the mixture resembles coarse crumbs. Gradually stir in the ice water until the dough holds together. Divide into two disks, wrap in plastic, and refrigerate for at least 1 hour.
-
Prepare the filling: Peel, core, and slice the apples. In a large bowl, toss the apple slices with sugar, cinnamon, nutmeg, lemon juice, and flour. Set aside to allow the flavors to meld.
-
Assemble the pie: Preheat your oven to 425°F (220°C). Roll out one dough disk on a floured surface to fit your pie dish. Place it in the dish, fill it with the apple mixture, and roll out the second disk for the top. Cut slits for ventilation, or create a lattice crust for a beautiful finish.
-
Bake: Brush the top crust with the beaten egg and sprinkle with sugar. Bake for 15 minutes, then reduce the oven temperature to 350°F (175°C) and continue baking for 30-35 minutes, or until the apples are bubbling and the crust is golden brown.
-
Cool and serve: Let the pie cool on a wire rack for at least 2 hours before slicing. Enjoy!
Best ways to enjoy it
This pie is delightful on its own, but it can be elevated even further with a scoop of vanilla ice cream or a dollop of freshly whipped cream. For a touch of warmth, serve it with a sprinkle of cinnamon or a drizzle of caramel sauce. Pair it with a cup of coffee or a spiced herbal tea for a comforting afternoon treat.
Storage and reheating tips
To store your leftover pie, cover it loosely with aluminum foil or plastic wrap and keep it in the refrigerator for up to 4 days. If you prefer to freeze it, wrap the pie tightly in plastic wrap, then in aluminum foil to prevent freezer burn—this will keep it good for up to 3 months. When you’re ready to enjoy it again, simply reheat in a preheated oven at 350°F (175°C) until warmed through.
Helpful cooking tips
A few tips can help ensure your apple pie turns out beautifully. First, always use chilled butter and ice water for the crust to achieve the flakiness you desire. When slicing apples, aim for uniformity in thickness so they cook evenly. Lastly, let your pie cool completely before slicing; this allows the filling to set and prevents a soupy slice.
Creative twists
Feeling adventurous? Swap out some of the apples for pears or add berries for a mixed fruit pie. Spice aficionados might consider adding ginger or cardamom for extra warmth. If you’re watching gluten, try using a gluten-free flour blend for the crust, ensuring to check the packaging for baking instructions.
FAQ
Q: Can I use store-bought pie crust?
A: Absolutely! Store-bought crust can save you time. Just make sure to follow the package instructions.
Q: What type of apples work best for apple pie?
A: A mix of tart and sweet apples is best. Granny Smith for tartness and Honeycrisp for sweetness is a classic combination.
Q: How can I prevent a soggy crust?
A: Pre-bake your crust for 10 minutes (also known as blind baking) before adding the filling. This helps set the crust and reduce moisture penetration.
Making a homemade apple pie is a rewarding journey that leads to a dish that’s as enjoyable to share as it is to eat. This classic dessert promises to delight anyone who takes a bite—so gather your ingredients and get baking!